List of figures
 | Fig. 1: | Playing area and dimensions 3.6 Playing Surface |
 | Fig. 2: | Playing area and dimensions 3.7 Court-Check |
 | Fig. 3: | First refree 4.1 First Referee |
 | Fig. 4: | Second Referee 4.2 Second Referee |
 | Fig. 5: | Score sheet - front 5 Scoresheet |
 | Fig. 6: | Score sheet - back 5 Scoresheet |
| Fig. 7: | General details regarding the match 5.1 Preparation | |
 | Fig. 8: | Teams 5.1 Preparation |
 | Fig. 9: | Approval 5.1 Preparation |
| Fig. 10: | After the coin toss - Winner of the coin toss 5.2 After the Coin Toss | |
 | Fig. 11: | After the coin toss - teams 5.2 After the Coin Toss |
| Fig. 12: | After the coin toss - general match details 5.2 After the Coin Toss | |
| Fig. 13: | After the coin toss - set 1 5.2 After the Coin Toss | |
| Fig. 14: | The actual starting time is recorded and the first server is being marked. 5.3 Points and Court Switch | |
| Fig. 15: | 0 : 1. 5.3 Points and Court Switch | |
| Fig. 16: | 1 : 4. 5.3 Points and Court Switch | |
| Fig. 17: | 1 : 5. 5.3 Points and Court Switch | |
| Fig. 18: | Court switch at 1 : 6. 5.3 Points and Court Switch | |
| Fig. 19: | 2 : 6. 5.3 Points and Court Switch | |
| Fig. 20: | 2 : 7. 5.3 Points and Court Switch | |
| Fig. 21: | 3 : 7. 5.3 Points and Court Switch | |
| Fig. 22: | 4 : 8. 5.3 Points and Court Switch | |
| Fig. 23: | Court switch has already been made at 5 : 10. 5.3 Points and Court Switch | |
| Fig. 24: | Team A takes a time-out. 5.3 Points and Court Switch | |
| Fig. 25: | Team B reaches its 21st point. 5.3 Points and Court Switch | |
| Fig. 26: | Ending time, final results, crossing out remaining points. 5.3 Points and Court Switch | |
| Fig. 27: | End of first set. 5.3 Points and Court Switch | |
 | Fig. 28: | Yellow card for player 2 of team A. 5.4 Recording Warnings and Sanctions |
 | Fig. 29: | Red card for player 2 of team A. 5.4 Recording Warnings and Sanctions |
| Fig. 30: | The points gained by team B for the red card for team A has to be circled. 5.4 Recording Warnings and Sanctions | |
 | Fig. 31: | Red card for team B. 5.4 Recording Warnings and Sanctions |
 | Fig. 32: | Second red card for player one of team A. 5.4 Recording Warnings and Sanctions |
 | Fig. 33: | Sanctions for delay. 5.4 Recording Warnings and Sanctions |
 | Fig. 34: | Finalized score sheet. 5.5 After the Match |
 | Fig. 35: | External space, crossing space, space below the net 6.2 Crossing Space |
 | Fig. 36: | Balls through the crossing space 6.2 Crossing Space |
 | Fig. 37: | Balls through the external space 6.2 Crossing Space |
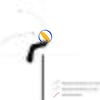 | Fig. 38: | Reach beyond the net 6.5.1 Reach Beyond the Net |
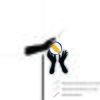 | Fig. 39: | Reach beyond the net 6.5.1 Reach Beyond the Net |
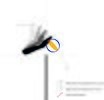 | Fig. 40: | Reach beyond the net 6.5.1 Reach Beyond the Net |
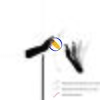 | Fig. 41: | Reach beyond the net - blocker 6.5.1 Reach Beyond the Net |
 | Fig. 42: | blocking fault 6.5.2 Blocking Fault |
 | Fig. 43: | Blocking fault 6.5.2 Blocking Fault |
 | Fig. 44: | Attack hit fault 6.5.3 Attack Hit Fault |
 | Fig. 45: | Attack hit fault 6.5.3 Attack Hit Fault |
 | Fig. 46: | Joust 6.7 Joust |
| Fig. 47: | Warning and sanction 6.8 Delay | |
 | Fig. 48: | Sanction scale 7 Sanctions |